Setup
How to set up a dartboard at home, step by step
Set up a dartboard at home in eight steps: choosing the wall, fixings, board height, wall protection, lighting, the oche at 2.37 m and protecting the floor.
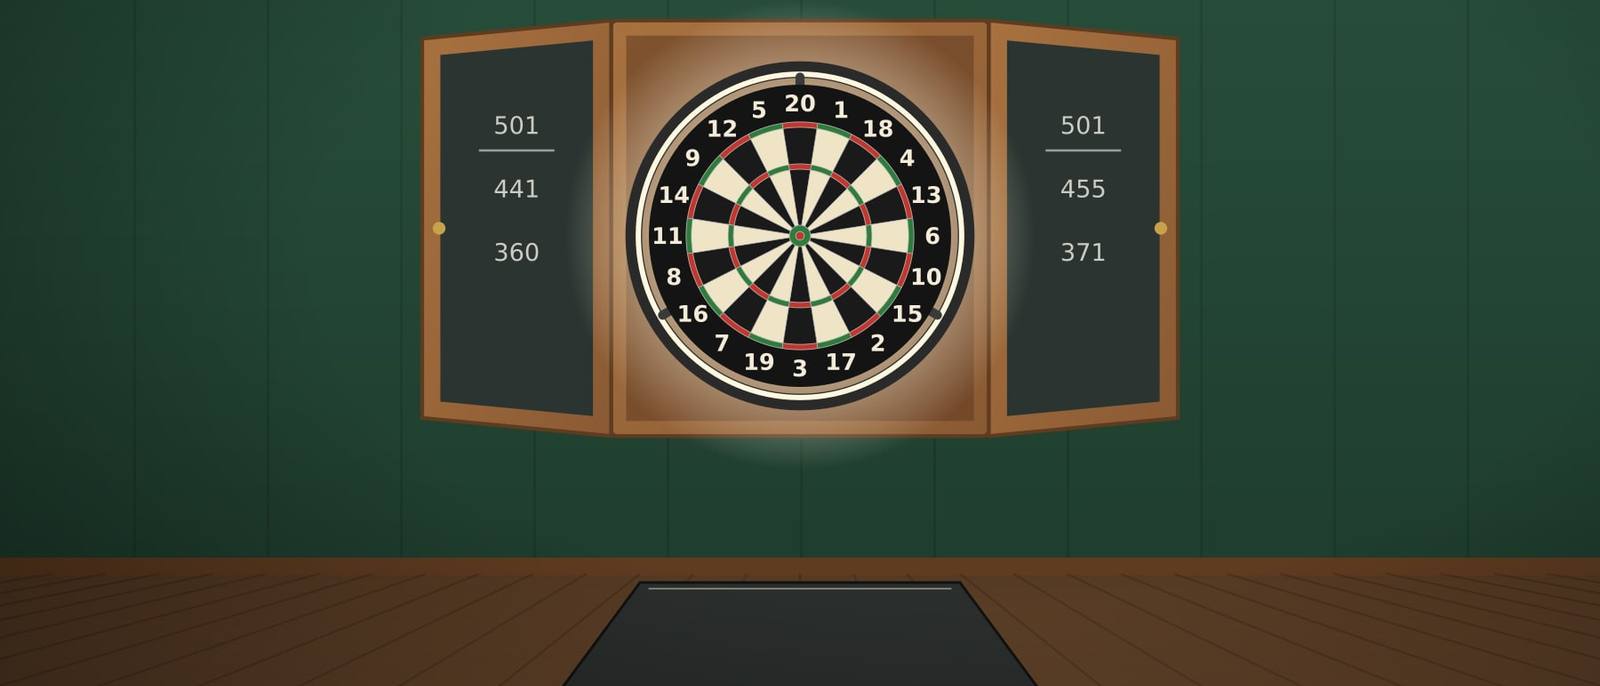
Setting up a dartboard is a small DIY job, but the details decide whether it plays like the board at your local or like a toy. This guide goes through it in order: where to put it, how to fix it, how high, how to protect the wall and floor, how to light it and where the line goes.
What you need
- tape measure (at least 3 m) and pencil
- spirit level
- drill and the right bits for your wall
- cable and pipe detector
- wall fixings to suit the wall (more on this below)
- masking tape or an oche mat for the throw line
- a second person for measuring the diagonal and lifting a cabinet
Step 1: Choose the spot
The board needs a wall with a clear lane in front of it. Plan for about 3 m from the wall to behind the throw line and roughly 1 m of clear space either side of the board. The exact numbers are explained in Dartboard height and oche distance.
Things to avoid:
- Doors in the lane. Nobody should be able to walk in between the line and the board. Choose a wall where the door is behind the thrower or well to the side.
- Glass and screens. Windows, glass cabinets, picture frames and televisions near the board will be hit sooner or later.
- Walkways. A board at the end of a hallway or next to the kitchen door means people walking past mid-throw.
- Damp, heat and direct sun. Sisal swells in damp and dries out next to a radiator or in full sun. A cold, damp garage or outbuilding is hard on a bristle board. A dry garage is fine.
Spare rooms, games rooms, a dry garage or the end of a long living room are the usual places that work.
Step 2: Check the wall
What is behind the plaster decides your fixings. Knock on the wall and look at how it was built.
- Brick or block: standard plugs and screws, sized for the weight of what you are hanging. A cabinet with a board inside is much heavier than a board alone.
- Plasterboard on studs (stud partition): find the studs with a detector or a magnet and screw into them where you can. Between studs, use cavity fixings rated for the load. Darts landing in the board put repeated small shocks on the fixings, so do not rely on plain plastic plugs in plasterboard.
- Plasterboard on dabs (dot and dab): there is a gap behind the board and then brick or block. Use fixings long enough to reach the masonry behind.
Before drilling, run a cable and pipe detector over the area. In UK homes, cables usually run straight up, down or across from sockets and switches, but you cannot count on it, especially in older houses.
Step 3: Hang the board at 1.73 m
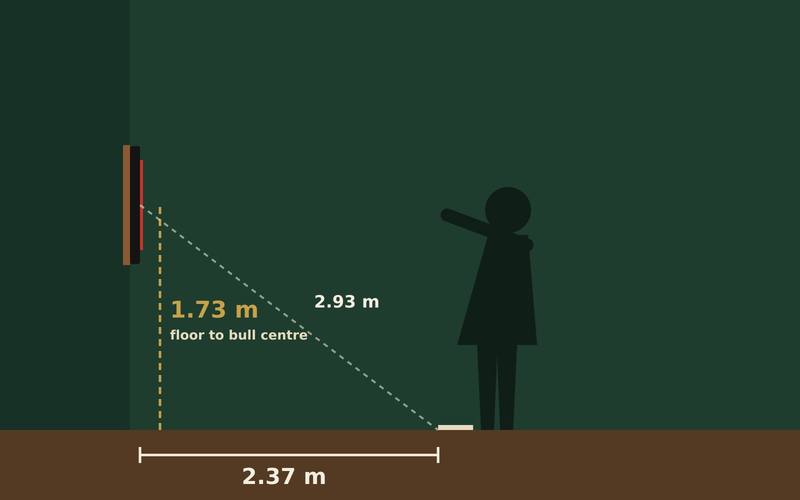
The centre of the bull goes 1.73 m above the floor you stand on to throw.
- Mark 1.73 m on the wall and draw a short level line.
- Work out where the bracket sits on the back of the board relative to the bull. On most boards it is right behind the bull, so the wall plate goes on your mark.
- Fix the wall plate, hang the board with the 20 at the top and check it is level.
- Measure from the floor to the centre of the bull once more.
For a cabinet, fit the board inside first, find where the bull sits relative to the cabinet's fixing points, and hang the cabinet so the bull ends up at 1.73 m. Lifting a cabinet into place and holding it level while someone else marks the holes is a two-person job.
Step 4: Protect the wall
Even good players miss, and steel points go straight into plaster. You have three main options:
- A surround: a foam ring that clips around the board and catches near misses. It needs no extra fixings.
- A backboard: a larger panel of cork or soft board behind the board that catches wider misses.
- A cabinet: a backboard and two doors with scoreboards, which also closes the board away after play.
For an experienced player in a garage, a surround is often enough. For a family room where children or guests throw, a cabinet or a surround plus a backboard is safer for the wall. The pros and cons are set out in Dartboard cabinet or surround.
Step 5: Light the board
A ceiling light rarely does the job. Light from one direction throws the shadow of each dart across the board, and a light behind you throws your own shadow onto it. The simplest fix is an LED ring light around the board, which shines in from all sides so shadows cancel out.
Plan the cable before you finish the wall work. A socket close to the board keeps the cable short, and cable clips or a length of trunking keep it tidy. Ring light or overhead light, brightness and glare are covered in Dartboard lighting.
Step 6: Mark the oche at 2.37 m
The throw line goes 2.37 m from the face of the board to the back edge of the line, measured horizontally along the floor. Measure from the face of the board, not from the wall: a cabinet or a backboard moves the face forward.
- Hold a spirit level upright against the face of the board, or hang a weight on a string from the bull, and mark the floor directly below the face.
- Measure 2.37 m from that mark and mark the back edge of the line.
- Check the diagonal: 2.93 m from the centre of the bull to the back of the line at floor level.
- Lay tape or an oche mat with its back edge on your mark.
For soft-tip boards, many manuals use about 2.44 m instead. Check yours.
Step 7: Protect the floor
Darts that bounce out or are dropped land point first. On wood and laminate that leaves dents, on tiles it chips the glaze and blunts the point. An oche mat under the board area takes those hits and gives you a non-slip surface to throw from. Mats with printed lines save you measuring the throw line every time you move them.
Step 8: Decide how to keep score
- Chalk or whiteboard: the traditional way, and cabinet doors usually have one built in.
- An app: many free apps take the subtraction off your hands.
- Automatic scoring: an electronic board for soft-tip darts, or a camera kit that watches a normal bristle board. Both are explained in Electronic or bristle dartboard?.
If you are new to the game itself, Dartboard scoring explained covers 501, doubles and checkouts.
Safety at home
- Only the thrower stands at the line. Everyone else waits behind, at least 60 cm back, which is what the WDF rules ask of an opponent.
- Nobody walks to the board until the thrower has finished their three darts.
- Keep darts out of reach of small children, and close a cabinet when the game is over.
- Keep pets out of the room during play.
- Check fixings now and then, especially on plasterboard.
Setup checklist
| Item | Target |
|---|---|
| Clear floor in front of the board | about 3 m from the wall |
| Clear space either side | about 1 m |
| Centre of the bull | 1.73 m above the floor you stand on |
| Board orientation | 20 at the top, level |
| Throw line, steel tip | 2.37 m from the face of the board |
| Diagonal check | 2.93 m bull to back of line |
| Wall protection | surround, backboard or cabinet |
| Light | ring light or lights from more than one side |
| Floor | oche mat or other protection |
A complete setup or parts?
You can build the setup piece by piece or buy a complete setup where the board, the cabinet, the light and the mat are sized to work together. If you are watching the budget, A home darts setup on a budget explains which parts to buy first.
Frequently asked questions
Where is the best place to put a dartboard at home?
On a solid wall with about 3 m of clear floor in front of it and roughly 1 m of space either side, away from doors, windows, glass and walkways. A spare room, a games room or a dry garage all work well.
Can I hang a dartboard on a door?
It is not a good idea. Doors move, hollow doors dent easily, and someone can open the door into the throwing lane. If you cannot fix anything to a wall, use a free-standing dartboard stand instead.
What fixings do I need for a dartboard on plasterboard?
Fix into the timber or metal studs behind the plasterboard where you can. Between studs, use cavity fixings rated for the weight of the board or cabinet. Plain plastic plugs in plasterboard work loose under the repeated impact of darts.
How long does it take to set up a dartboard?
A board with a surround can be up in under an hour if the wall is straightforward. A cabinet with a light and a cable to tidy takes longer, so allow an afternoon and have a second person to help with lifting and measuring.