Buying advice
A home darts setup on a budget: what to buy first
Building a darts setup at home on a budget: why the board comes first, where cheap is fine, where it costs you more, and an upgrade path that wastes nothing.
You do not need to buy everything at once to play darts properly at home. A sensible order of purchases gets you throwing at a regulation setup straight away and lets you add the extras later without replacing anything. This guide sets out that order, where it is fine to save, and where saving tends to cost you more.
The order that makes sense
- A good bristle board. Everything else is built around it.
- Wall protection. A surround first, a backboard or cabinet later if needed.
- The throw line. Tape to start, a mat when you can.
- Light. A ring light once you notice the shadows.
- Extras. A cabinet, a stand, camera scoring, a second set of darts for guests.
With the first three you are already playing at the regulation height and distance. The rest makes the setup nicer to use, but it does not change the game.
1. Do not save on the board
The board is the one item where the cheapest option is often the expensive one. What to look for:
- Bristle (sisal), not paper, cork or coiled paper. Sisal closes up after each dart and lasts years.
- Thin wiring. Thick round wire deflects darts. Bounce-outs mean lost scores, bent points and darts on the floor.
- No staples in the scoring area. Older and cheaper designs hold the wire with staples on the face of the board, which is another source of bounce-outs.
- A removable number ring. It lets you rotate the board as the 20 wears, which spreads the wear and makes the board last longer.
- Regulation size. 451 mm across, so it fits standard surrounds, cabinets and ring lights later.
A board with these features is the best value in darts. You can see what we mean on our bristle dartboard.
2. Protect the wall with a surround
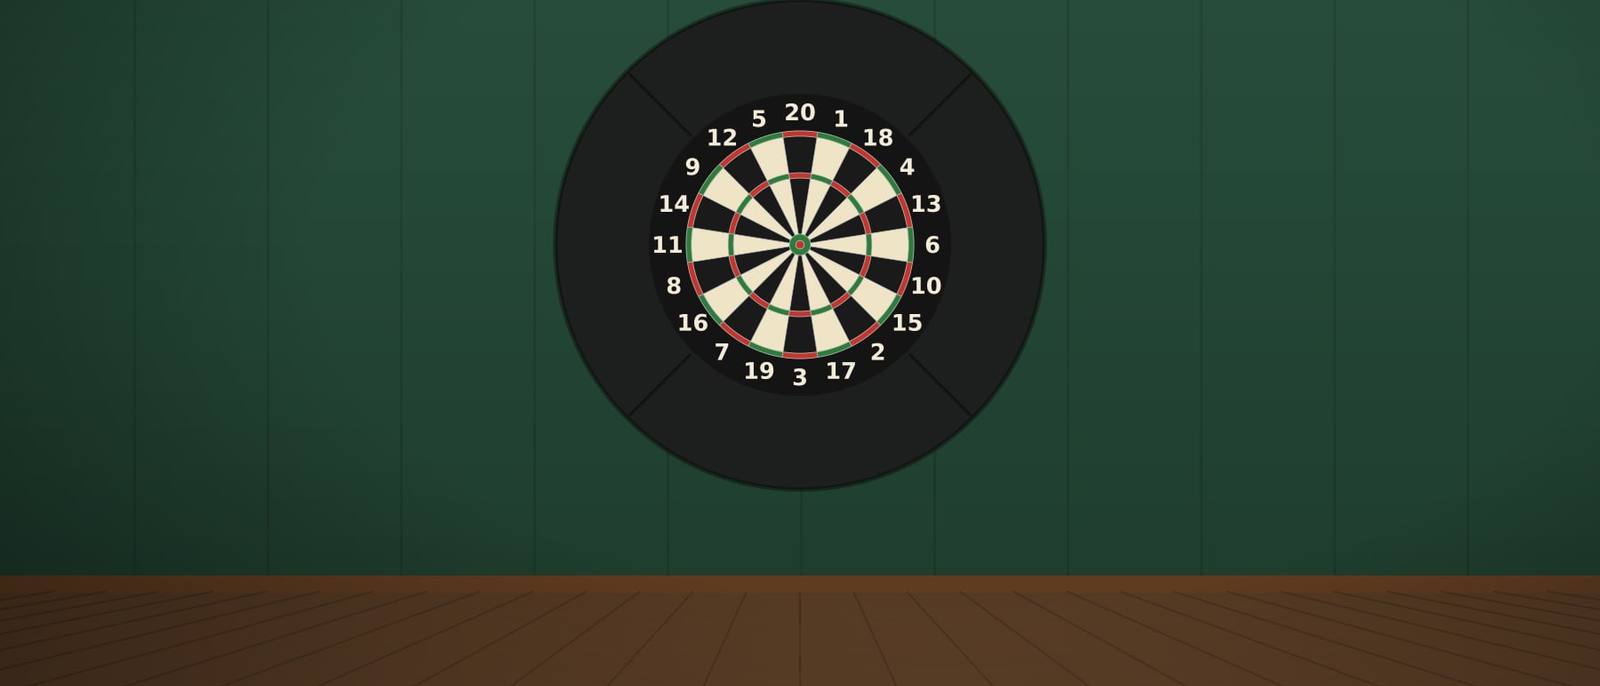
A foam surround catches the darts that just miss the board and keeps your points sharp. It clips around the board and needs no extra fixings. For most players it is the best value way to protect a wall.
If beginners or children will play, wider misses still reach the wall. The budget fix is a backboard behind the surround: a large panel of cork or soft board that a dart sticks into. Hard boards like MDF are a poor choice because darts bounce off them. A cabinet does the same job and more, but it can wait. The full comparison is in Dartboard cabinet or surround.
3. The throw line: tape first, mat later
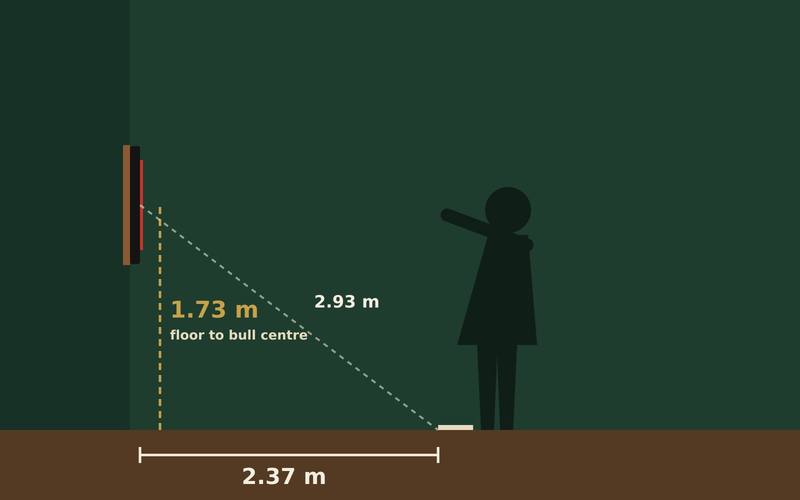
The line goes 2.37 m from the face of the board to the back edge of the line. A strip of tape measured carefully costs next to nothing and is perfectly accurate. Check it with the diagonal: 2.93 m from the centre of the bull to the back of the line at floor level. Dartboard height and oche distance explains how.
A mat is the upgrade. It protects wood, laminate and tiles from dropped darts and has the lines printed on, so you do not have to measure every time it moves. If your floor is carpet and the room is used only for darts, tape can last a long time. If darts fall on a wooden floor, the mat moves up the list.
4. Light: start with what you have
A ceiling light gives you shadows, but you can play. To improve things without spending, move a lamp so it lights the board from the side and slightly in front, rather than from behind you. Two lamps, one each side, are better still.
When the shadows start to annoy you, a ring light around the board is the upgrade that makes the biggest difference to how the board plays. More in Dartboard lighting.
5. Extras that can wait
- A cabinet. Worth it for a living room or a family home, and for the scoreboards in the doors. Not needed to play.
- Camera scoring. The most expensive upgrade, and one that works with the bristle board you already have, so buying a good board first is not wasted.
- A stand. Only needed if you cannot fix the board to a wall.
- Spare darts. A cheap second set for guests saves your own darts from being dropped.
Where saving costs you more
- Thick-wire boards. More bounce-outs, faster wear, and you end up buying a second board.
- Flimsy stands. A stand without a wide, solid base wobbles when darts land. That is annoying, and it can tip over.
- Plastic plugs in plasterboard. The repeated impact of darts loosens them. Fix into studs or use rated cavity fixings.
- Hard backboards. Darts bounce back off MDF or plywood towards the thrower.
Where saving is fine
- The throw line. Tape is as accurate as any mat.
- Scoring. A whiteboard, a chalkboard or a free app all work.
- Room lighting. A repositioned lamp is a reasonable start.
- The look. A plain surround protects as well as a printed one.
Budget setups for different rooms
A small flat: bristle board, surround and a backboard behind it, tape line, a battery or USB ring light so there is no extra cable to run. Add a mat if the floor is hard.
A dry garage: bristle board and surround on the wall, tape line or a mat, and a mains ring light. Keep the board away from damp walls and do not leave it in a cold, damp outbuilding over winter.
A family living room: this is where a cabinet earns its keep, because it protects more wall and closes the board away. Start with board and surround and add the cabinet later, or start with a complete setup where the parts already fit together.
A rented home: a free-standing dartboard stand with a surround and light needs no holes in the wall at all.
A shopping list in stages
Stage one, to start playing:
- bristle board with thin wiring and a removable number ring
- foam surround
- tape for the throw line
- wall fixings that suit your wall
- a set of darts
Stage two, a few weeks later:
- LED ring light
- oche mat with printed lines
- a whiteboard or chalkboard if you prefer it to an app
Stage three, if you are hooked:
- cabinet, for a living room or a family home
- camera scoring kit for automatic scoring on the same board
- a second board to rotate between, if you play most days
Each stage builds on the one before. Nothing from stage one becomes useless when you move on, which is the whole point of buying in this order.
Look after what you buy
A few habits make a budget setup last:
- Rotate the board using the number ring when the 20 starts to wear.
- Never soak the board. Sisal swells when wet.
- Keep it away from radiators and direct sun.
- Replace flights and stems instead of whole darts when they get damaged.
- Pull darts out with a slight twist, not by levering them, to keep the sisal tight.
Timing
Plenty of home setups go up in December and January, while the World Darts Championship is on at Alexandra Palace. The 2026/27 tournament runs from 11 December 2026 to 3 January 2027. If you want the board on the wall before it starts, plan a free afternoon, check what your wall needs in the way of fixings, and have a tape measure ready. How to set up a dartboard at home has the full checklist.
Frequently asked questions
What should I buy first for a darts setup?
A good bristle board, then something to protect the wall around it, usually a surround. With those two, a tape measure and some tape for the throw line, you can play properly. Add a light and a mat next.
Is it worth buying a cheap dartboard?
The board is the one place where the cheapest option tends to cost more. Boards with thick wire and staples cause more bounce-outs and wear out faster. A mid-range bristle board with thin wiring is the better buy.
Can I make my own throw line?
Yes. A strip of tape measured to 2.37 m from the face of the board works fine. A mat with printed lines is more durable and protects the floor, so it is a good second purchase.
Do I need a dartboard cabinet?
Not to start with. A surround protects the wall for most players. A cabinet is worth it in a living room, with children around or if you want the board out of sight when nobody plays.